I collect old Macintosh computers. It’s fun booting these things up and playing games from my childhood. Games like Lemmings, Harry the Handsome Executive, Escape Velocity, Spaceward Ho!, and of course the famous Marathon.
There’s just one problem… the mice for these old computers suck.
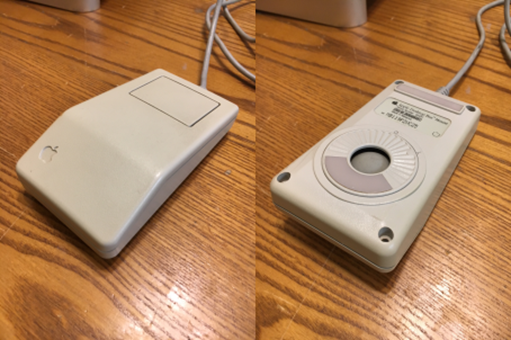
A rubber ball rolls along your mousepad. It picks up dirt and grime and must be cleaned frequently or it just becomes unusable.
Luckily, these days we have optical mice. But no optical mice were ever made for these old computers. They don’t use standard USB, or even the older PS/2. Instead, they use an earlier interface called Apple Desktop Bus.
In this blog post I’ll show you how to hack a modern optical mouse to connect to this ancient ADB interface.
Parts Needed
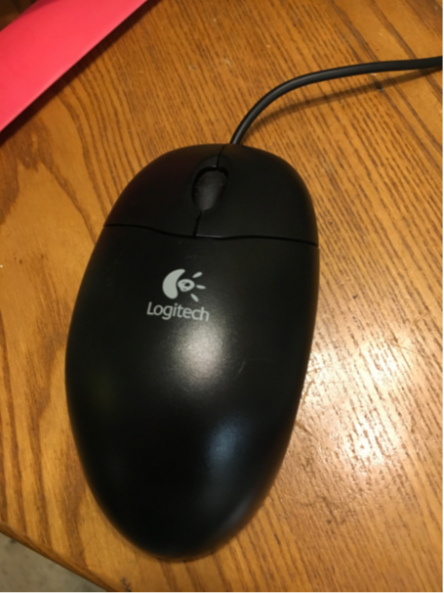
You’re going to need an optical mouse (obviously). But not just any mouse. You want the optical mouse. I speak, of course, of the Logitech SBF96.
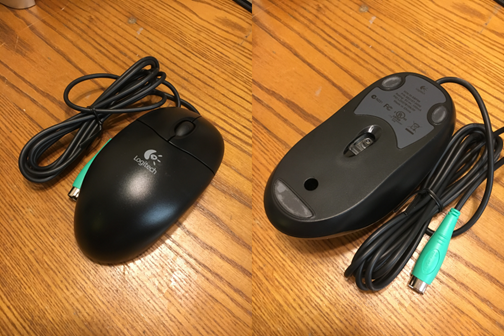
This mouse was massively popular in the early 2000’s. So much so that you can still find it brand new, never used, on Amazon, for $9. They must have made hundreds of millions of them.
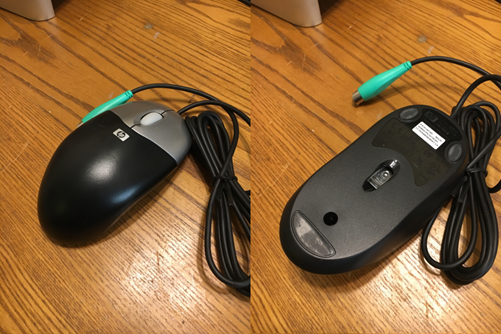
Interestingly, there are HP-branded variants too. They appear to be mostly the same inside, right down the circuit board. The only difference is they’re missing a bit of metal that serves as weight and/or reinforcement.
They didn’t even bother to change the model number, really:
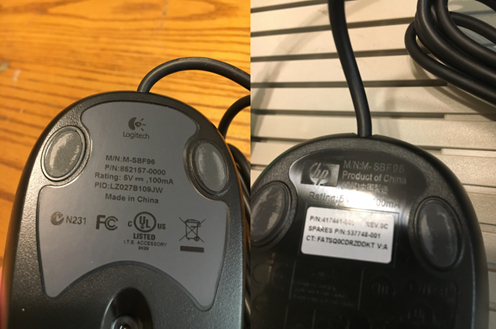
Anyway, you’ll need one of either of these mice. There may be other rebrands of the same mouse. Who knows.
The next thing you’ll need is a microcontroller. I chose this board:

You’ll find many clones of this board on eBay/Amazon/AliExpress, usually for around $6 or so. The original is over at https://www.sparkfun.com/products/12640. If you’re willing to pay $20 rather than $6, and you want more potential reliability, you might want to go that route. Otherwise, just get something like this: http://a.co/1tvU9PY or this: http://r.ebay.com/b2mLOX.
The last piece we need is an ADB connector to graft onto the end of our mouse. ADB connectors are ancient history now, so buying one on eBay is always a gamble. Luckily, S-Video connectors and cables are 100% compatible with ADB. In fact, I just use S-Video cables in place of ADB cables as a rule. They’re usually black, and don’t really match the beige and off-white of old Macs, but hey, function over form, right?
You can just go to eBay and search for “s-video extension cable”. Here’s one: http://r.ebay.com/YYaSLf
To recap, here’s the parts list:
- Arduino Pro Micro – $6 on eBay
- SBF96 Mouse – $6 on eBay
- S-Video cable – $6 on eBay
- A 5k-20k resistor – free? (Hopefully you have one of these already)
Hacking the Hardware
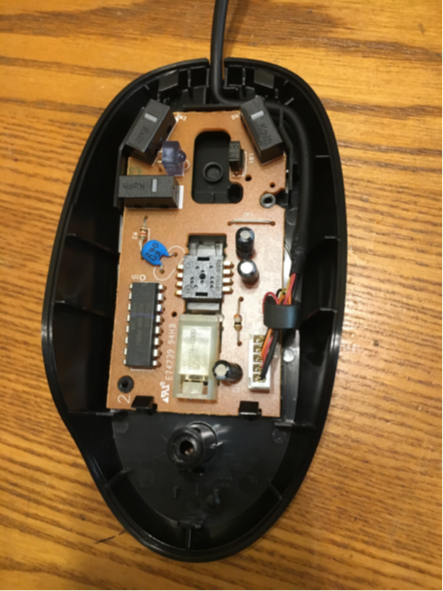
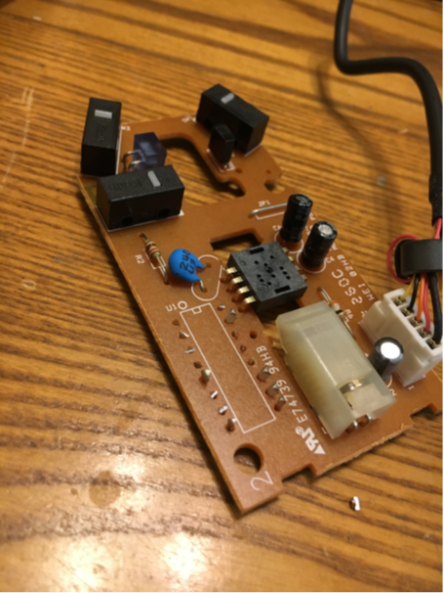
The first thing to do is open the mouse.
To add our microcontroller, we’ll have to remove the existing microcontroller.
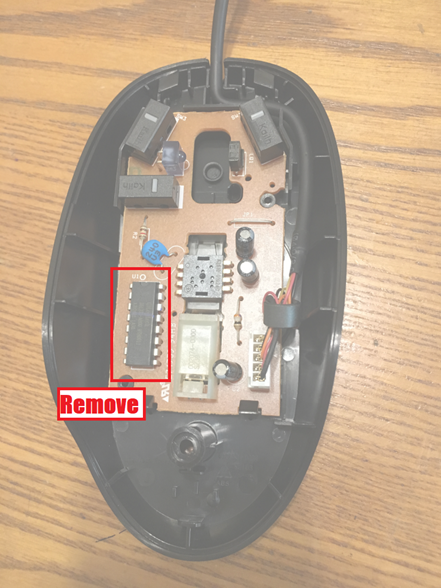
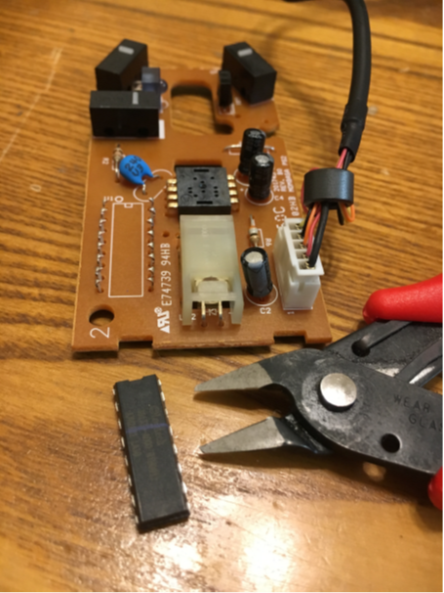
You can carefully de-solder it, or just do what I do, and snip the leads:
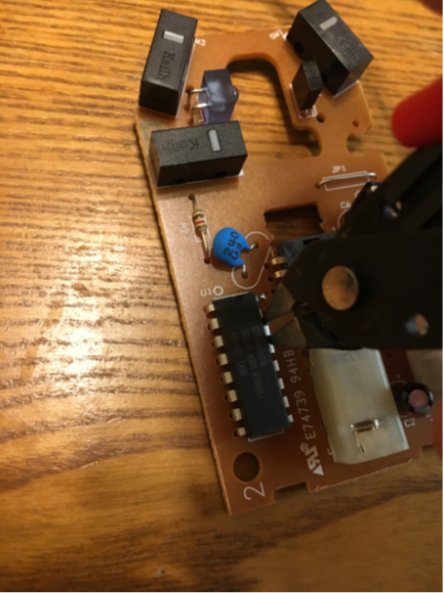
Perfect.
We only need the leads which connect to the optical sensor, the mouse button, and the cable. Here’s a diagram of the mouse circuit board:
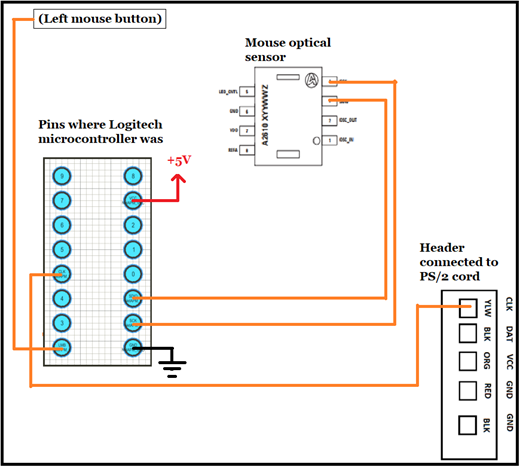
As you can see, we only need pins 5, 8, 9, 10, 11, and 15. Snip down all the rest: (Don’t forget eye protection!!!)
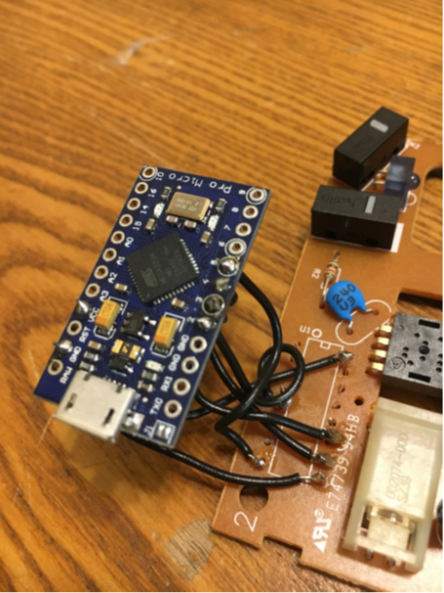
Now we need to solder some wires to connect the microcontroller to these 6 remaining pins. Here’s the wiring diagram to make things simple:
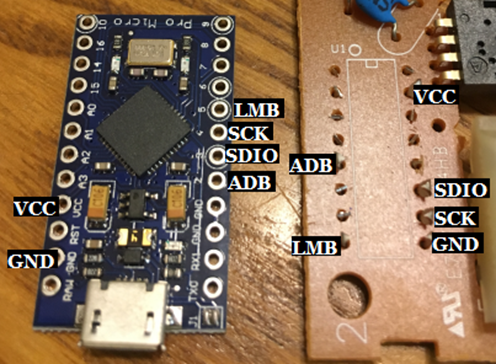
End result:
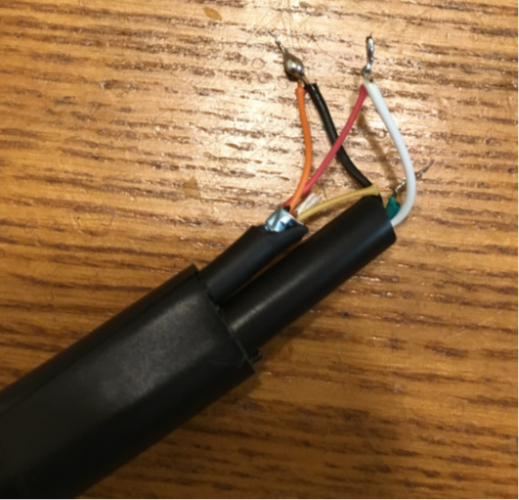
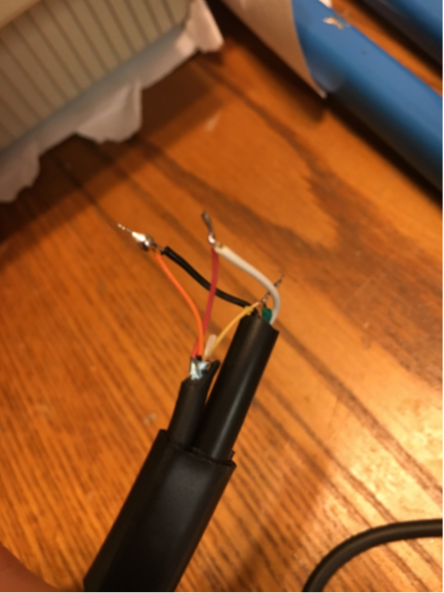
Now cut and strip the cable:
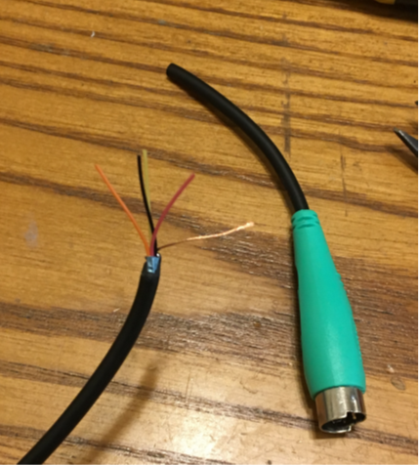
Earlier I showed the pinout for these lines as they enter the board, including colors:
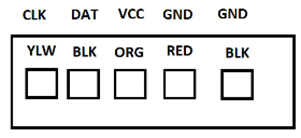
(Since there are two black wires, you can either test each one with a multimeter to determine which is GND, or you can just use the red wire, which is definitely GND).
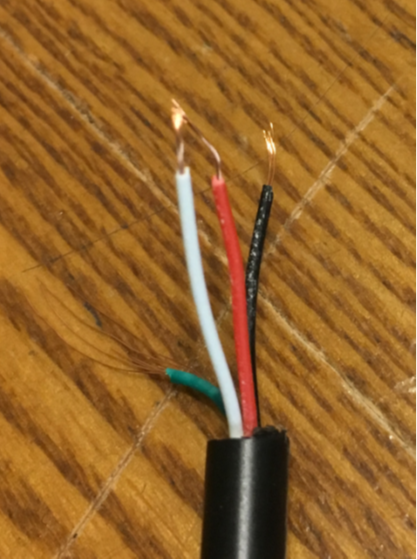
And now do the same with the S-Video cable:
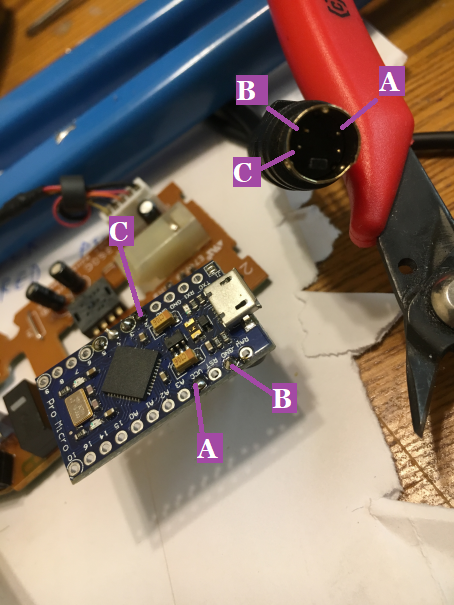
Now here’s where your steps may differ from mine. Looking at this diagram of the ADB connector:
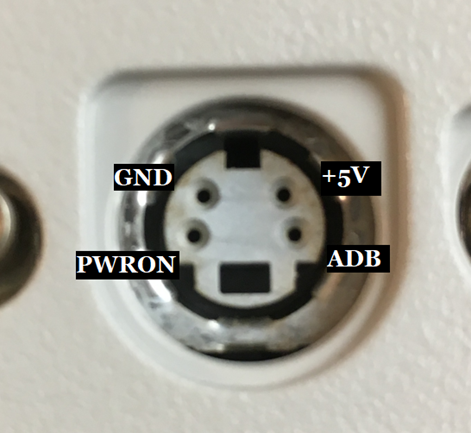
I was able to use a multimeter to figure out which wires were connected to which pins. This will be a tedious step that you’ll have to do on your own. Here was the result of matching the wires on my S-Video cable:

Yes, black will be +5V. That could be confusing.
Anyway, snip away any connections you don’t need (you only need GND, VCC, and the ADB signal).
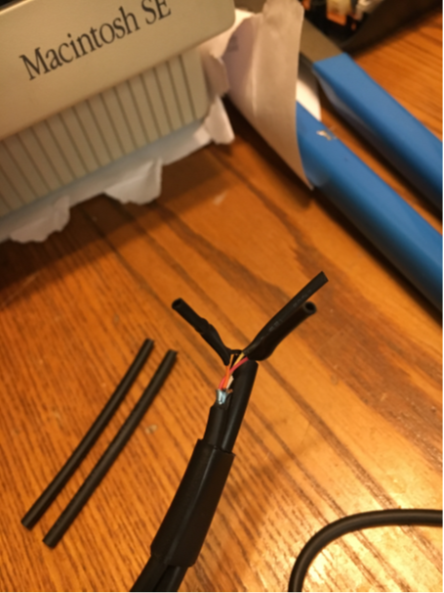
Then solder those wires together to make your frankencable:
Now, because that step is so easy to get wrong, do a quick end-to-end check with a multimeter:
One last thing is needed: A pulldown resistor on the button pin (pin 5 on the microcontroller).
Here’s how I did that:

I just soldered the resistor over top of pin 5, and soldered the other end to an available GND pin.
Hacking the Software
At this point it’s probably a good idea to make sure the microcontroller still works.
Install the Arduino IDE and open it up.
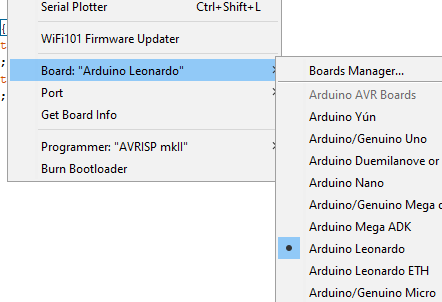
Then, under Tools, Change the board type to “Arduino Leonardo”:
Connect your microcontroller via a micro-USB cable to your PC. You should see it show up in the Arduino IDE under this menu:
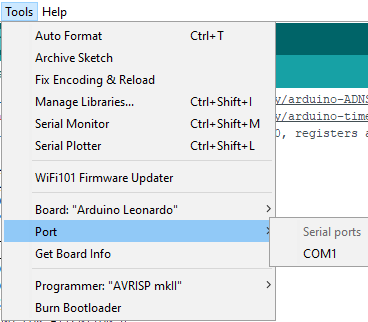
Select it.
Copy-paste the code from this page into the editor:
Save it.
Click the Upload button. You should see blinking LEDs on the board.
Now it’s time to program the actual program to the microcontroller! Excitement!
First, download the two necessary libraries:
- https://github.com/halferty/arduino-ADNS2620/archive/master.zip
- https://github.com/halferty/arduino-timerone/archive/master.zip
Go back into the Arduino IDE and add those libraries:
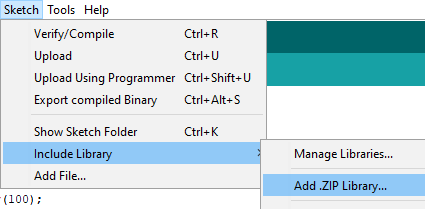
Now copy-paste the code from here into your sketch, replacing the code that was there before:
https://raw.githubusercontent.com/halferty/arduino-adb-mouse/master/arduino_adb_mouse.ino
Press the Upload button to program your microcontroller.
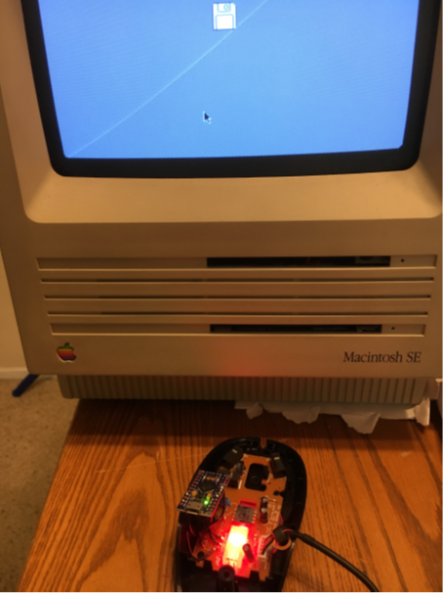
Now disconnect your microcontroller from the PC, and connect it via ADB to your Macintosh.
If you did everything correctly (and I didn’t fail to record a step), then you should have a working ADB optical mouse!
Now let’s close this thing up.
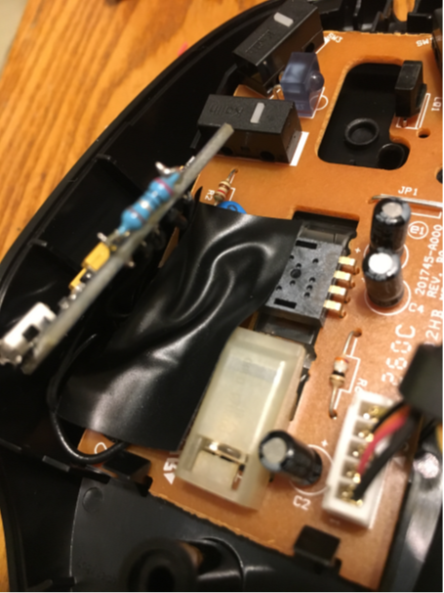
First, put some electrical tape below the microcontroller:
And on top of it:
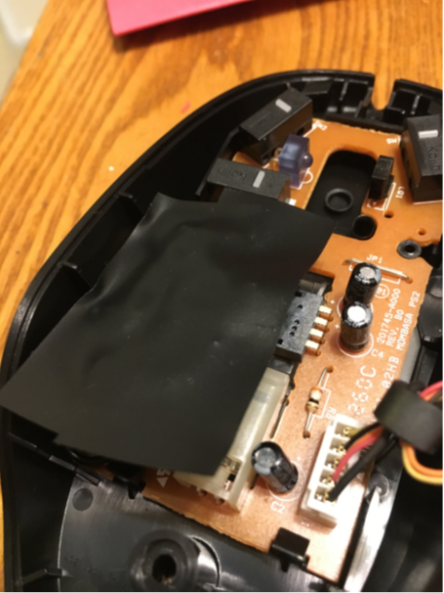
Everything should close up correctly:
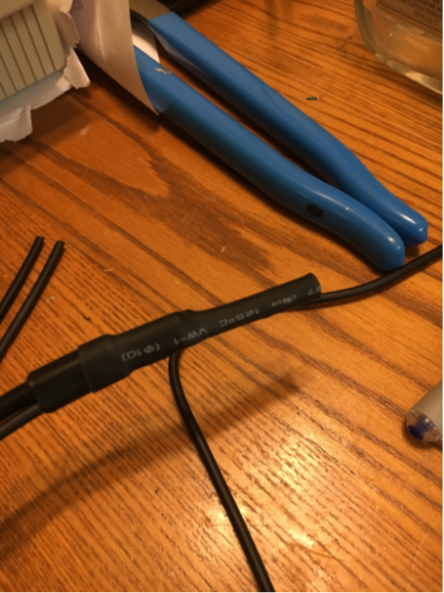
Now we just have the problem of our exposed wire splice:
Electrical tape is great for holding things in place temporarily, but it’ll loosen up over time. Instead, use heat-shrink tubing. I really can’t say enough good things about heat-shrink tubing:
It’s really a good idea to have a whole assortment of heat-shrink tubing sizes:
Conclusion
And that’s it! We’re done. You should now have a usable optical ADB mouse. The only problems you might experience are: The mouse might need mouse acceleration. It seems to be difficult to click on small details like close boxes, because the mouse wants to move too much. Mouse acceleration might be the fix for that. Alternatively, maybe just decreasing the mouse speed in the control panel would be enough.
Another problem with this setup is, it may cause issues with other ADB devices. In practice, I haven’t found any. But then again, I only use keyboard/mouse. If you’re using something more adventurous, like multiple mouse peripherals at the same time, then you might run into issues because I cheated a bit when making this program (I hardcoded the ID number of the device, and the Macintosh can’t change it at runtime, because my mouse will just ignore the commands).